

 |
| Click me to make me BIGGER! |
Friday, February 8, 2013
Clay Tea Pots
Clay class is going to create slab tea pots based on Famous Artists. Here is the hand out
All artwork on the handout is of contemporary ceramist Noi Volkov which can be seen here.
Thursday, January 10, 2013
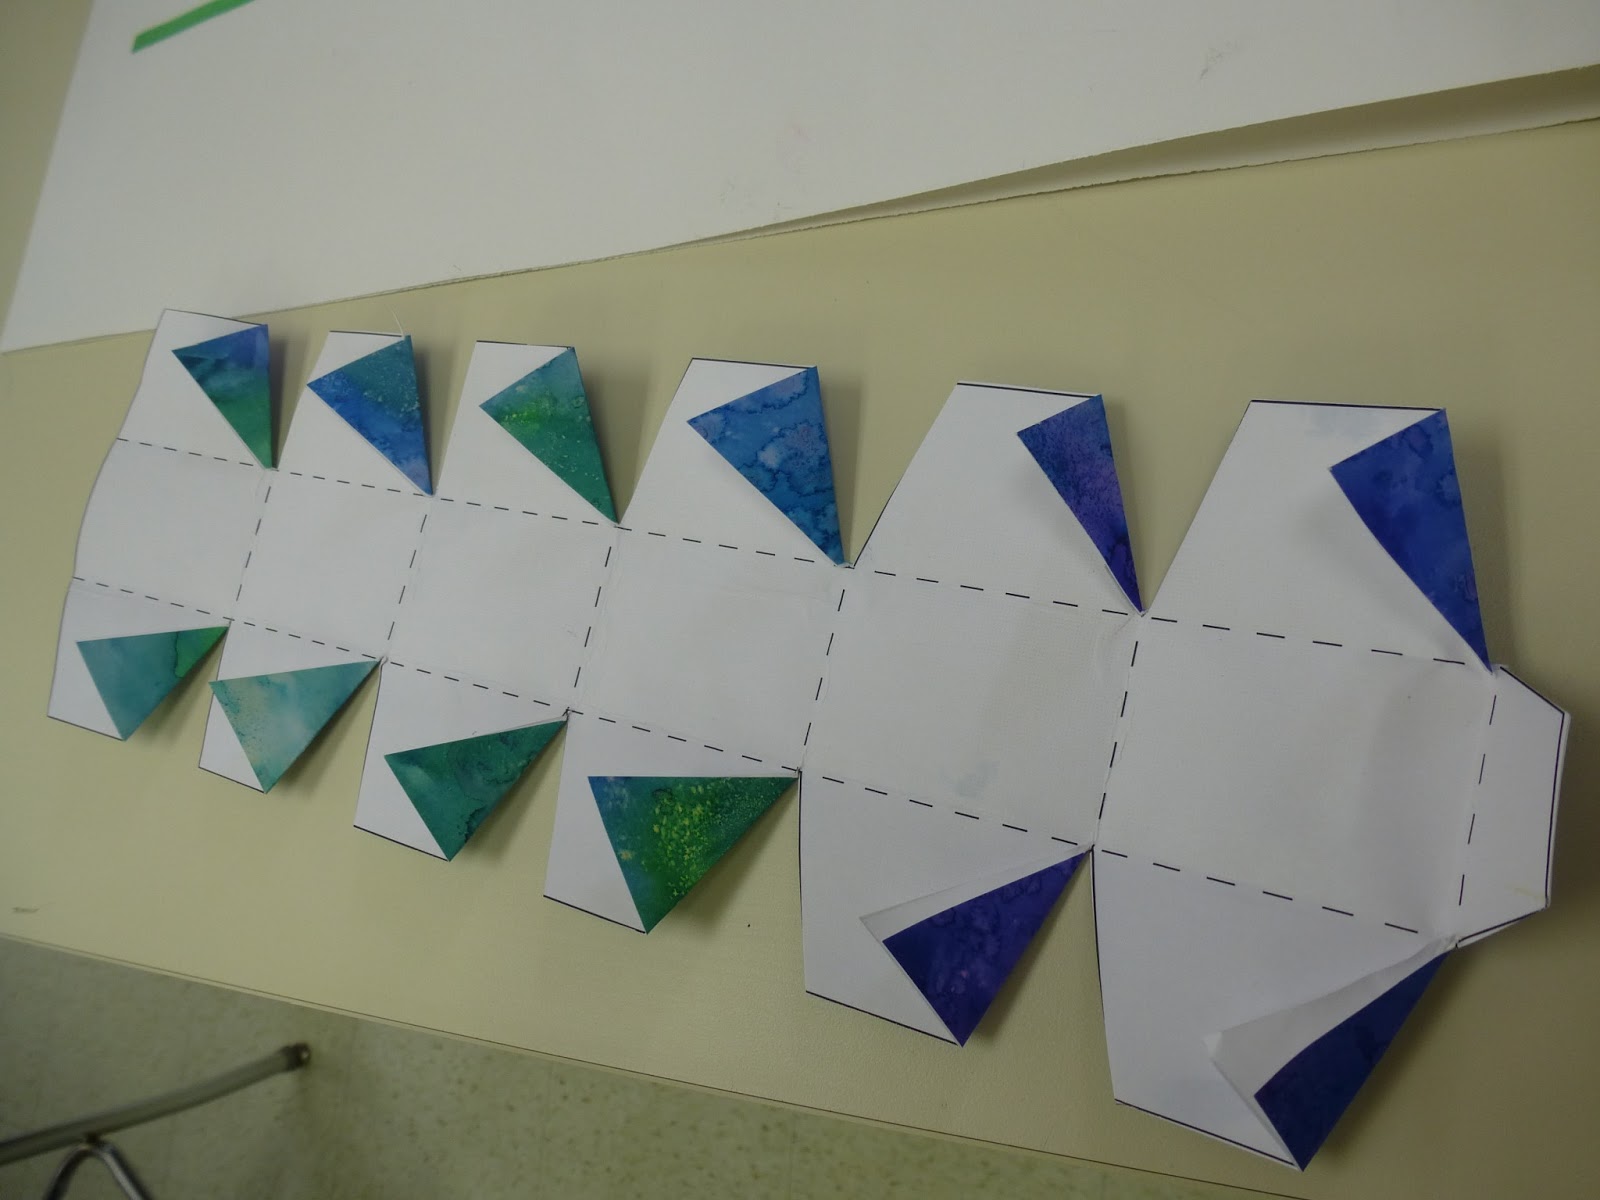
Watercolor Lanterns- Painting I/II

Tuesday Painting started watercolor lanterns. They created their paper using liquid watercolors, salt to create a starburst effect and plastic wrap to create "folds".
Wednesday they applied the pattern to the lanterns and started applying zentangles to them. They could do the entire lantern or part of the lantern with patterns.
Here a photos of the steps in creating the lanterns.
 |
| Step 1- Painting with the salt and watercolors |

 |
| Step 2- Adding the pattern to the back- cutting it out and folding so you know where to zentangle. |

 |
| Step 3- Zentangling at its finest. |
 |
| More zentangling |
 |
| Step 4- Putting them together. |
 |
| Backside of the lantern with tabs folded. |
 |
| Frontside with tabs folded. |
 |
| Finished!!!! |
LINE- Drawing and Design
LINE in art is like letters in words and numbers in math............
What we are learning about-
Line is the most basic element of art!
What is Line quality?
How can you show mood with line?
Create a 2x2 grid in the first 2 pages of your sketchbook:
Show me the following types of lines:
What we are learning about-
Line is the most basic element of art!
What is Line quality?
How can you show mood with line?
Create a 2x2 grid in the first 2 pages of your sketchbook:
Show me the following types of lines:
Wave
Brick
Circle
Zig Zag
Triangle
Star
Scales
Weave
Thick
Spiral
Curves
Thin
Angry
Sad
Confused
Happy
Music- what kind ?
Hard rock vs Classical
You may use any materials you like to show me these lines- Your goal- to be DIFFERENT than EVERYONE else in the room! Why........................artists need to think OUTSIDE of the BOX!
Friday, January 4, 2013
1st Semester Projects that Need to Be Turned in
Semester 1 art projects still need to be turned in! You have until Tuesday, January 8th 3:30 to turn in things. I will be here until 4 pm on both Monday and Tuesday. You spent ALOT of time and effort on these projects, not to mention they were due BEFORE the 21st. I will also except all late work. Here is what needs to be turned in and what will count as extra credit:
2nd Hour
Graded:
Rolled Paper Cityscapes
Extra Credit:
Map Painting
5th Hour
Graded:
Maps
Storyboards and worksheets
6th Hour
Drawing I-
Pick one to be graded and one to be extra credit:
Graffiti or Free Choice
Also 12x18 zentangles!
Drawing II
ALL projects are due!
7th Hour
Graded:
Storyboard
Extra Credit:
Recyled art project
Also- please stop by the art room and pick up ALL art work by Friday!
Monday, December 3, 2012
Week of Dec 3rd
2nd Hour Drawing and Design
Last week to work on your Paper Cityscapes!!! We are getting along nicely with these!!!
5th and 7th Hour Drawing and Design
Working on Storyboards- Creating a 6-10 frame story about an object. Below are the handouts for the assignment if you need extra!
We started out by watching this clip from Toy Story- it talks about the storyboard process and how it works.
Here is one from the movie Brave which show us how they now create storyboards digitally.
This one is from Monsters INC. Very good from start to finish. http://www.youtube.com/watch?v=0q8mrsUqHsk&feature=share&list=PL6801DAC4808E9A91
Here are the handouts you will use in the class for your sketches for your assignment:


Monday, November 26, 2012
Weekly Happenings for Nov. 26th
Here is what going on the art room this week:
2nd Hour- They are working on paper skylines. Here is a link to the example! Due next Monday!
5th Hour- Working on zentangle skylines! Due Wednesday!

7th Hour- GIGANTIC ZENTANGLES!!! 24x36 zentangle with a partner or an 18x24 alone......stay tuned for images! Due Wednesday


Drawing and Design
2nd Hour- They are working on paper skylines. Here is a link to the example! Due next Monday!
5th Hour- Working on zentangle skylines! Due Wednesday!

7th Hour- GIGANTIC ZENTANGLES!!! 24x36 zentangle with a partner or an 18x24 alone......stay tuned for images! Due Wednesday

Drawing I
Reflection Self Portraits- They are creating self portraits using a picture taken looking into a bulb. Here is examples of the photo. They were printed 8x8 and will be doubled to 16x16 and created in black and white.


Drawing II
Working on one of there many assignments:
Self Portrait
Large free choice (larger than 18x24)
2 free choices

12x18 zentangle

Monday, October 29, 2012
Drawing I tessellations

Drawing I created 19 triangle designs using a sharpie marker. Now they are going to use Photoshop to create tessellations!
Here are the instructions:
Drawing I
Tessellations!!!
If opening
your triangles for the first time: (If you have already created a tessellation skip ahead to the blue area!!!
1. Open your triangles.
2. Select the MAGIC wand tool. (forth from the top)
3. Click your empty triangle.
4. Go to SELECT- Modify-Contract 2
pixels.
5. Go to SELECT- Save Selection- name
it triangles.
6. GO TO FILE SAVE AS- press ok- you
want this to be a psd file so you can load your selection next time you open
your file!
If you have
already done steps 1-6.
1. Open your triangles.
2. Select the rectangular marquee tool
(2nd down).
3. Go to SELECT-Load Selection.
1. Now that
you have a triangle selected move it to the triangle you want (you must have
the rectangular marquee tool or the magic wand too selected)- use the arrow
keys to nudge your outline and Cmd + to zoom in and Cmd – to zoom out.
2. Copy your triangle (Cmd C)
3. File- New-
Width
10 INCHES
Height
8 INCHES
Resolution
300
RGB
mode
4.
Paste
your triangle.
5.
Select
the arrow tool (top tool)
6.
Duplicate
your layer (Cmd J)
7.
Edit-
Transform- Flip Vertical
8.
Move
your triangle down and match it PERFECTLY!!!
9.
Cmd
E (merge down) rename your layer diamond.
10.
Cmd
J (duplicate layer)
11.
Move your triangle to the left.
12.
Edit-
Transform- Flip Horizontal
13.
Select- transform- Rotate- at the top where
you see the angle type 60.
14.
Move over to match up PERFECTLY- remember to
use the arrow keys to line it up perfectly.
15.
Cmd+J
16.
Edit-
Transform- Flip Vertical
17.
Move
your diamond to line up perfectly.
18.
Cmd
E twice!!! Make sure you don’t merge
down to the background layer!!!
19.
Cmd
J and move to line up- Fill your entire 10x8 canvas! You can merge your layers to make a larger
image, but make sure you keep on single to fill in small layers.