Monday, December 3, 2012

Week of Dec 3rd


2nd Hour Drawing and Design

Last week to work on your Paper Cityscapes!!!  We are getting along nicely with these!!!


5th and 7th Hour Drawing and Design

Working on Storyboards- Creating a 6-10 frame story about an object.  Below are the handouts for the assignment if you need extra!

We started out by watching this clip from Toy Story- it talks about the storyboard process and how it works.


Here is one from the movie Brave which show us how they now create storyboards digitally.

This one is from Monsters INC.  Very good from start to finish.  http://www.youtube.com/watch?v=0q8mrsUqHsk&feature=share&list=PL6801DAC4808E9A91


Here are the handouts you will use in the class for your sketches for your assignment:


Monday, November 26, 2012

Weekly Happenings for Nov. 26th

Here is what going on the art room this week:

Drawing and Design

2nd Hour-  They are working on paper skylines.  Here is a link to the example!  Due next Monday!

5th Hour- Working on zentangle skylines!  Due Wednesday!

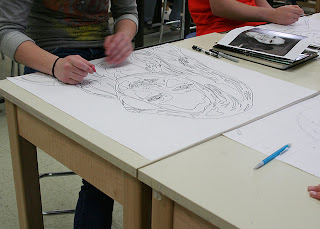
7th Hour- GIGANTIC ZENTANGLES!!!  24x36 zentangle with a partner or an 18x24 alone......stay tuned for images!  Due Wednesday


Drawing I

Reflection Self Portraits- They are creating self portraits using a picture taken looking into a bulb.  Here is examples of the photo.  They were printed 8x8 and will be doubled to 16x16 and created in black and white.


Drawing II

Working on one of there many assignments:

Self Portrait
Large free choice (larger than 18x24)
2 free choices

12x18 zentangle


Monday, October 29, 2012

Drawing I tessellations


Drawing I created 19 triangle designs using a sharpie marker.  Now they are going to use Photoshop to create tessellations!


Here are the instructions:


Drawing I Tessellations!!!

If opening your triangles for the first time: (If you have already created a tessellation skip ahead to the blue area!!!

1.    Open your triangles.
2.    Select the MAGIC wand tool.  (forth from the top)
3.    Click your empty triangle.
4.    Go to SELECT- Modify-Contract 2 pixels.
5.    Go to SELECT- Save Selection- name it triangles.
6.    GO TO FILE SAVE AS- press ok- you want this to be a psd file so you can load your selection next time you open your file!

If you have already done steps 1-6.

1.    Open your triangles.
2.    Select the rectangular marquee tool (2nd down).
3.    Go to SELECT-Load Selection.


1. Now that you have a triangle selected move it to the triangle you want (you must have the rectangular marquee tool or the magic wand too selected)- use the arrow keys to nudge your outline and Cmd + to zoom in and Cmd – to zoom out.
2.  Copy your triangle (Cmd C)
3.  File- New- 

Width 10 INCHES
Height 8 INCHES
Resolution 300
RGB mode

4.             Paste your triangle.
5.             Select the arrow tool (top tool)
6.             Duplicate your layer (Cmd J)
7.             Edit- Transform- Flip Vertical
8.             Move your triangle down and match it PERFECTLY!!!
9.             Cmd E (merge down) rename your layer diamond.
10.          Cmd J (duplicate layer)
11.           Move your triangle to the left.
12.          Edit- Transform- Flip Horizontal
13.           Select- transform- Rotate- at the top where you see the angle type 60.
14.           Move over to match up PERFECTLY- remember to use the arrow keys to line it up perfectly.
15.          Cmd+J
16.          Edit- Transform- Flip Vertical
17.          Move your diamond to line up perfectly.
18.          Cmd E twice!!!  Make sure you don’t merge down to the background layer!!!
19.          Cmd J and move to line up- Fill your entire 10x8 canvas!  You can merge your layers to make a larger image, but make sure you keep on single to fill in small layers.

Drawing II Second Quarter

Drawing II is self guided for 2nd Quarter.  Here are the requirements:

Self Portrait
Large Free Choice (larger than 18x24)
2 free choice

1 12x18 zentangle

Sketchbook Assignments

Where can you get ideas???

http://pinterest.com/artteach13/tanya-s-art-ed/
http://pinterest.com/artteach13/artsy-stuff/
http://pinterest.com/artteach13/art-to-inspire/

Books and binders on the Drawing II green bookshelf!!!


Wednesday, September 19, 2012

Drawing and Design- Small Bottle Series


Small Drawing Series

Create a series of drawings using line only – drawings can be contour or modified contour (lifted line). Remember to touch at least 3 sides of the paper and to FILL the paper with details!  Remember what you are graded on!

Looking up at a subject(s) – keep in mind composition

Looking down at a subject(s) – keep in mind composition


Fill page with one object only – go off the page on all 4 sides

Draw the still life close up, magnified less objects

Draw just the top half of the still life ( Use a long Sheet)

Draw just the bottom half of the still life (Use a long sheet)

How you will be graded:
  • At least 8 outlines per object
  • Line quality
  • Fill paper
  • Details
  • Likeness of objects (does it look like what it supposed to)
  • Neatness

Tuesday, September 11, 2012

Bottles- Drawing and Design

Click on me to make me BIGGER!
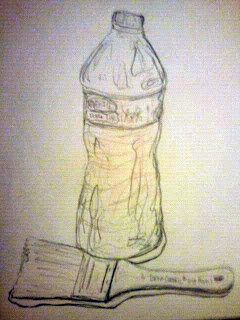
So here is your next assignment, there are two parts- the first part is to use a sharpie and outline all of the value changes in your bottle photos!  Yes-----ALL of them, this should take 1 or more class periods, not 5 minutes!!!  Check with Mrs. Norby to see if you are done, if you are she will give you a piece of 12x15 paper- she will send you back to your desk if you don't have everything outlined, as a matter of fact she may send you back a few times.   You can ask the Drawing one girls- they did this assignment when they were in Drawing and Design!

Here is a video explaining more!

Monday, September 3, 2012

Drawing and Design

Here is your next assignment!  You will need 12x18 paper and pencils!


Drawing I/II

 Today and tomorrow you will be creating contour line drawings using bottles from the still life cupboard. 

What you will need:
18x24 piece of paper
Pencil
Bottles for still life cupboard

Your goal:
To make ordinary bottles LOOK INTERESTING AND CREATIVE!

What you will do:

What I want it 10-12 bottles drawn on the sheet of paper.  You will want to think about the composition of the drawing.  What is composition????  Take time and discuss this as a class before you start drawing....what makes a good composition???  What makes a good bottle drawing?  Is it just the out line................no!  I want details!!!  I want to see the OUTLINES of the lights and darks in the bottle, reflections, shadows.  I want different LINE QUALITY. (What is line quality?)  I want the bottles to not look flat............I WANT YOU TO SEE! 

This assignment should take you 2 days, you should use the entire class period, if you finish in a day ask yourself this............did I have enough detail?  Did I fill my paper, is the composition interesting?  Does my drawing make someone want to look at it for seconds or 5 minutes????

Some examples of contour line drawings:


FOR WEDNESDAY:

You will need a pop can, or energy drink can, in good shape. 

Wednesday, August 29, 2012

Contour Line Hands


Contour Line Hands- NO SHADING!

Day 1:
Take a 18x24 sheet of paper and fold it into 4 sections. 

Look at your hand and pose them in a position so you can see the palm.  (No high fives)Draw just the outline of your hand, LARGER than the real thing, fill the space.

Now go to a blank area, switch and draw the back side of the hand- no fist or high five, but now a bit more detail, nails etc. 

For the third a fist from the palm side.  Draw more details, wrinkles that form and nails etc.

For the forth have draw whatever pose you want- be creative, more detail, no value.

Here are examples:

http://apollo13art.com/National/lifedrawing1/lectures/gesture_contour.html
http://studiojuliakay.com/portraitproject/2007_11_01_archive.html (Scroll down)
http://gal4.piclab.us/key/contour%20line%20drawings%20of%20hands  ( There are some good ones and bad ones!!)

Day 2 and 3

Now you are going to create cross contour line drawings from these hands, giving them form by using just lines.

Here are the examples.

http://studentwork.isabelmar.com/24/hand.html

Notice the way the line changes with the different contours of the hands.  They look 3-D (form) without value, just line!!!

On the back of your drawings rank your hands from 1-4 1 being the best 4 the worst, tell me why you ranked them that way.

Thursday, August 23, 2012

THe most basic art element......

Does anyone know that most basic element in art????


You guessed it line..............  I compare it to numbers in math or letters in words, with out line we wouldn't have shape or pattern or texture, we wouldn't have art!  Hey, even these words are creating an implied line!!!

Your assignment today is to create lines using a sharpie.  Fill each square with an example of line.  When you are done with that you will need to do another page with your own creative lines!!!!  Watch as the take on a pattern.  Remember- lines only don't fill in area with solid value!

Here is an example of an A work: (Click to make it bigger)

Credit: http://wendyjanelle.blogspot.com

Monday, August 20, 2012

Course Syllabi

Welcome to the art room!!!  I am super excited for the beginning of another year here at Crestwood!  As many of you know I had a baby this summer; a little girl.  So, I will be on maternity leave until Sept 14th, which means I will see all of your smiling faces on Sept 17th!!!

Here is a little Voice Thread to go over the course Syllabus!

Drawing I/II


Drawing and Design

Monday, May 14, 2012

Recycled Art for Drawing and Design

Your Semester "Test" is to create recycled art out of the magazines that are int he art room.

Here are the links to the recycled art sites:

http://pinterest.com/artteach13/recycled-magazine-art/


Wednesday, May 2, 2012

Zentangle Slides

Here are some of my classes Zentangle Slides- I loved them!  I tried to do a video, but my smartboard/elmo wasn't quite working!!!

What you need:


Old Slides (I used art history slides)
Sharpie
Needle tool to scratch into slide
2"x2" piece of paper (size of slide)
4 2"x1/2" (width of slide's thickest part) pieces of card board or 2 2"x 1/2" piece of foam core
8"x1/4" strip of black paper
Hot Glue


  1. Create a zentangle on the slide,  and piece of paper.
  2. Scratch into the slide.
  3. Hot glue the cardboard pieces to the think side of the the slide so they are two pieces thick.
  4. Hot glue the cardboard to the thick sides of the slides.
  5. Hot glue the slide to the 2"x2" piece of paper.
  6. Hot glue the black strip around the slide to inclose the slide and the background making a shadow box and concealing the cardboard.


Thursday, April 12, 2012

Bubbles, bubbles everywhere!


Go to google docs and download Coffeeshop Luminous Pop.  Make sure you CROP you image first to either 8x10 or 5x7- you don't want to take your focus away from the bubbles by having a lot of stuff in the background.

I also ran PW- sharpen this and filled the layer mask WHITE!

Wednesday, April 11, 2012

Finished Chihuly Sculptures and some Faces

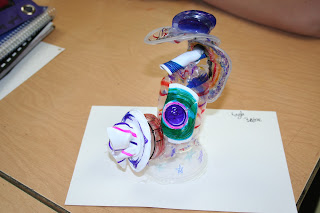
Wow- the Chihuly sculptures turned out great!!!!!  Here are a few, I will put a slide show up later.  The students enjoyed creating them, and I got such a variety of art work.


Yesterday when everyone had cleaned up and hung their portraits up on the drying "rack" I had to smile.  They looked so great!  To be honost I was a bit worried about the assignment, but Tuesday was a turning point, they are turning out wonderful.


Here is my finished product that I did with the class.


Tuesday, April 3, 2012

In full swing!

This week we are busy!  Sculptures are due, faces are getting close to adding value, we start silk hoop paintings!!!  I can't wait to show you finished products!!!  Although you get to see some finished Kandinsky circles!!!!


WATCH

IT

START TO

SHRINK!

STRAWS WORK TOO!

PART OF THE SCULPTURE


CIRCLES!

MORE CIRCLES

EVEN MORE CIRCLES!

24X24 SELF PORTRAITS!

STEP 2 ADD THE SHARPIE!

MORE PORTRAITS

ADDING SHARPIE.

SHARPIE ADDED- LOOKS GOOD!